Tag: play store

  • How to Install Play Store in Android Studio Emulator

    How to Install Play Store in Android Studio Emulator

    No Play Store in your Android emulator? Follow these simple steps to install the Play Store in Android Studio Emulator.

    Depending on how you installed the emulator in the Android Studio, there might no be a Play Store. If you are just using the emulator to test your own apps then you don’t need the Play Store. That being said, if you want to try apps that are already available via the Play Store then you need to have it installed in the Android emulator. Of course, if you really want to you can install APK files in the emulator directly in two different ways.

    However, if you want the full authentic experience or to avoid the hassle of installing apps via APK files, you have to have the Play Store in the Android emulator. The good thing is, the AVD Manager in Android Studio allows you to create emulators with Play Store built into them.

    In this quick and simple article, Let me show you a simple way to create a new Android emulator with Play Store built into it.

    Steps to Install Play Store in Android Studio Emulator

    To install the Play Store in the Android Studio emulator, you have to create a new emulator with a system image that already has Play Store included. The good thing is, the AVD Manager gives you the system image with the Play Store. You don’t have to download it from a third-party.

    You might have to download a system image which will around 1.5GB to 2GB. If you have data limits on your internet connection, becareful.

    1. Open Android Studio. If you are using Windows, open the Start menu, search for “Android Studio” and click on it. If you have one, you can also double-click on the desktop shortcut.

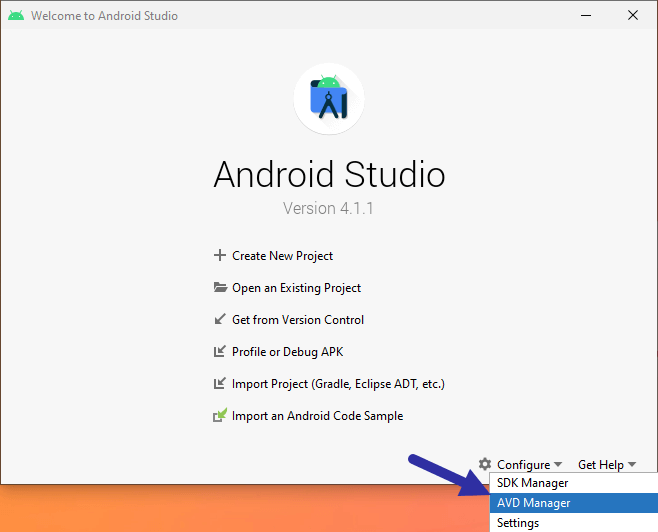
    2. Click “Configure → AVD Manager” option on the main screen.
    open avd manager 271220 1

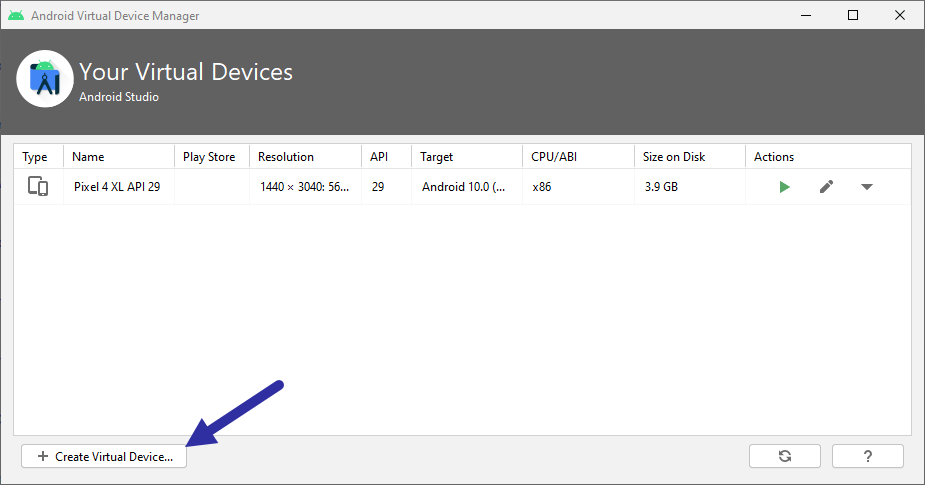
    3. After opening the AVD Manager, click on the “Create virtual device” option. This is how you create a new emulator.
    create new virtual device 271220

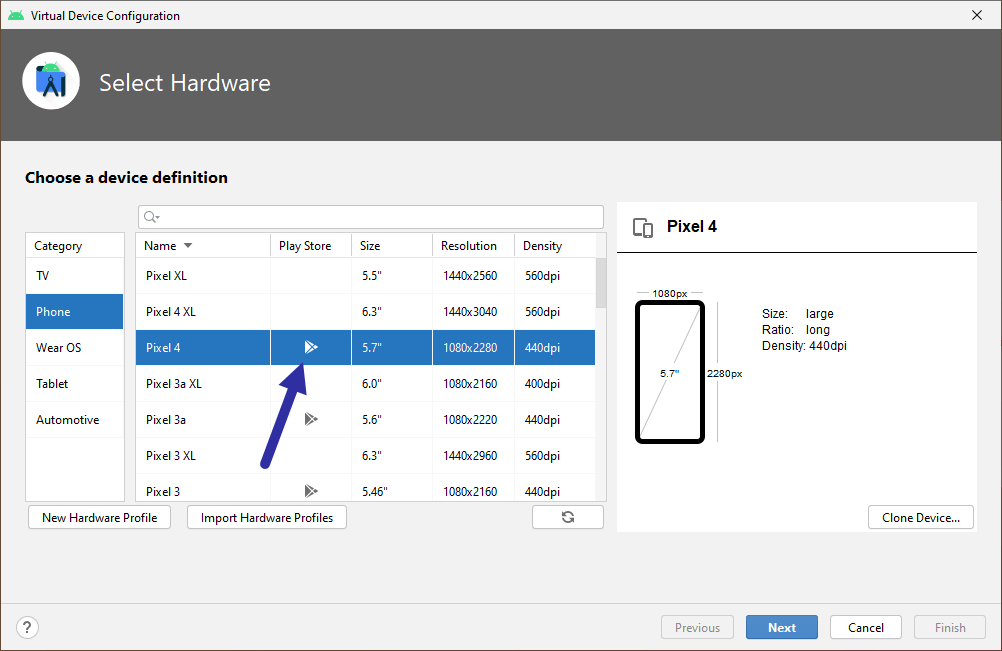
    4. Select “Phone” on the left panel, select the device in the middle plane. While selecting, make sure it has the “Play Store” icon in the Play Store column. This icon signifies the virtual device is compatible and comes with the Play Store. Click on the “Next” button.
    android emulator with play store 271220

    5. Here, select the system image you want to install and click “Next”.
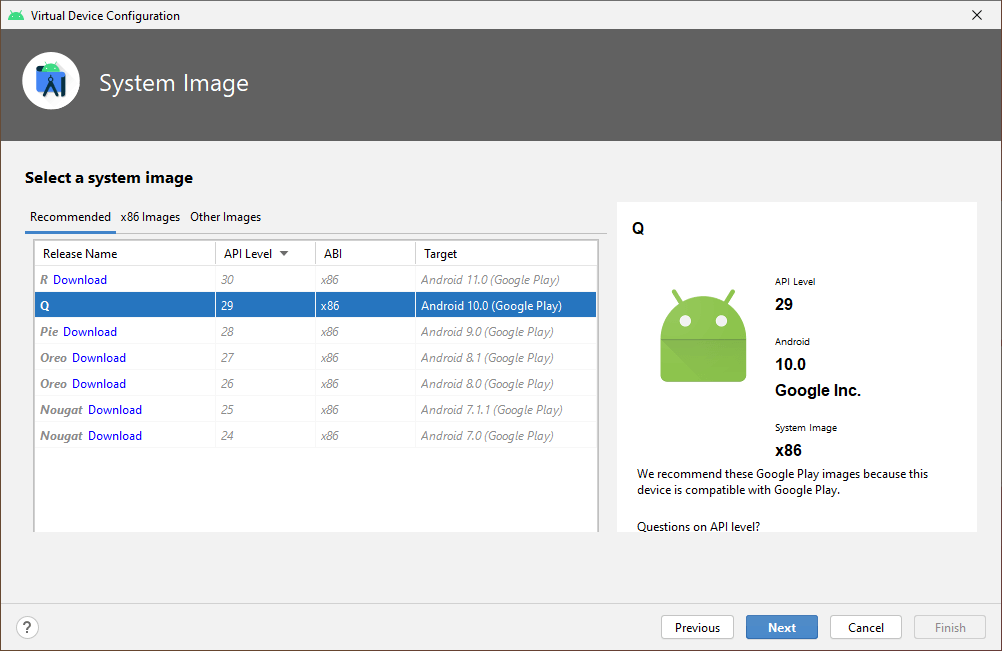
    system image with play store 271220

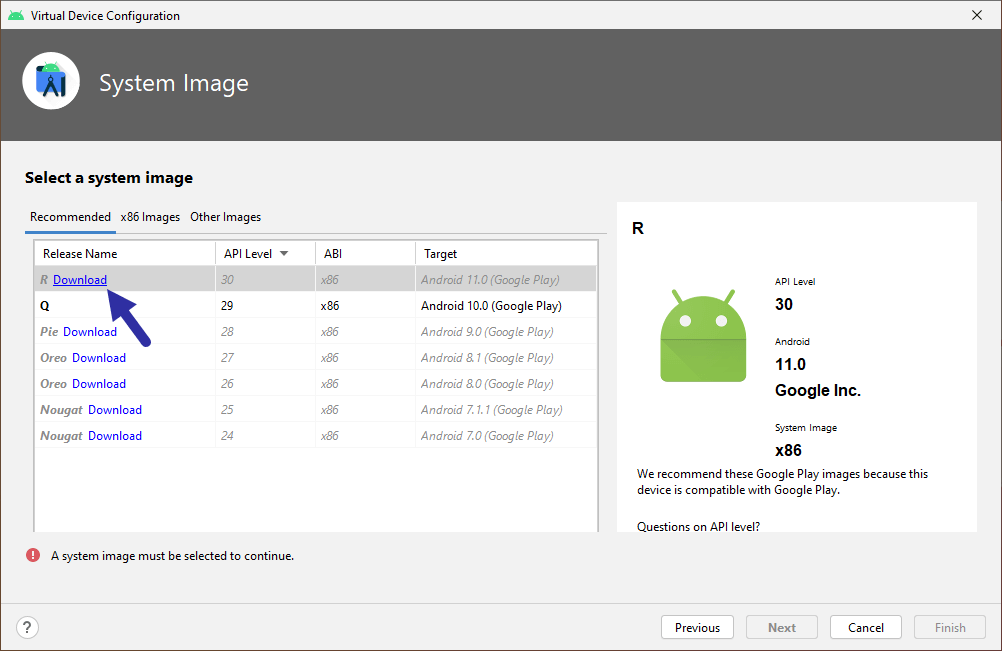
    If the system image is not installed, you can download and install it by clicking on the “Download” link next to Release Name. This action will download the system image from Google. As I said before, the system image will be anywhere from 1.5GB to 2GB.download system image with play store 271220
    6. Name the virtual device and click on the “Finish” button.
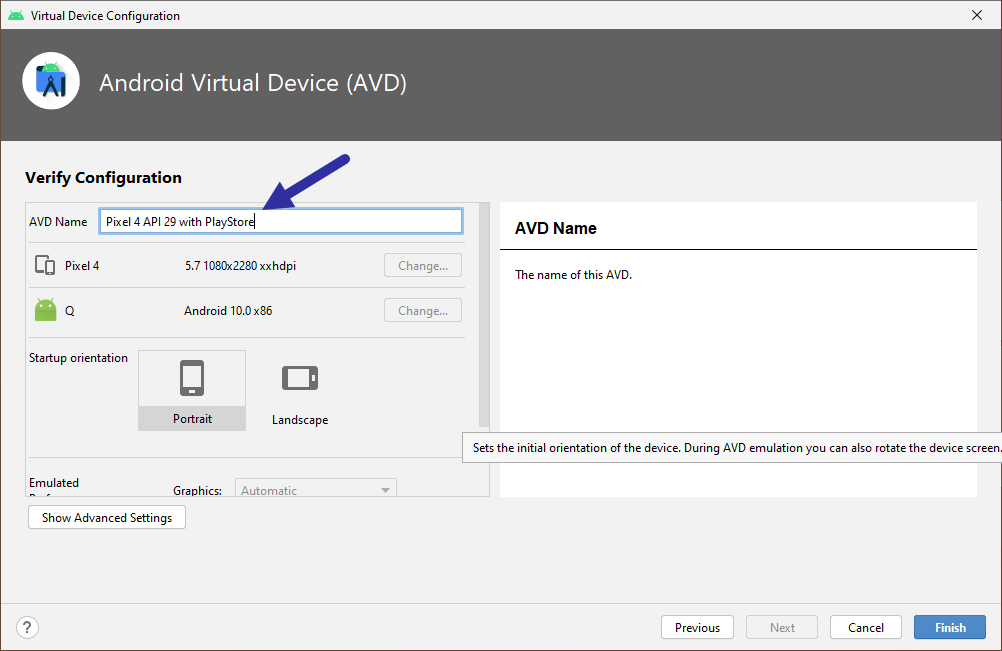
    name virtual device 271220

    That is all. With that, you have created a new emulator with Play Store, AKA, you’ve installed Play Store in Android Studio Emulator. You can launch the emulator by clicking on the “Play” icon in AVD Manager.
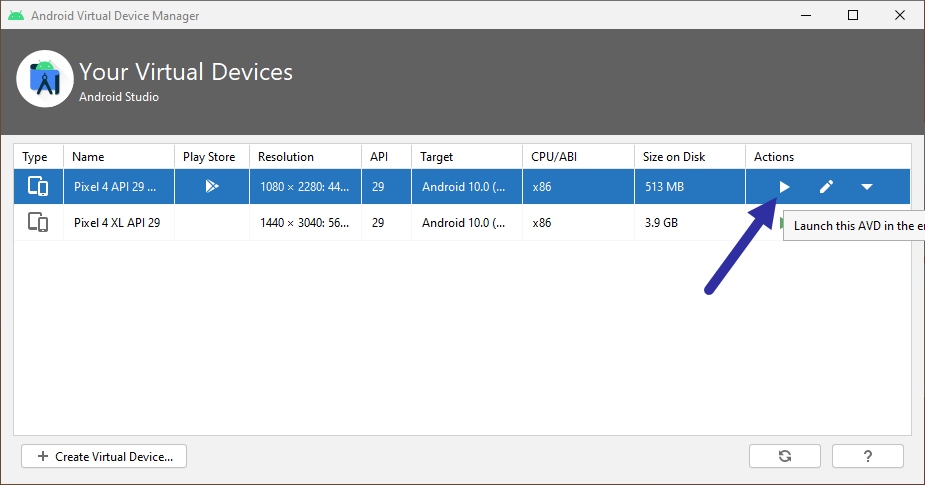
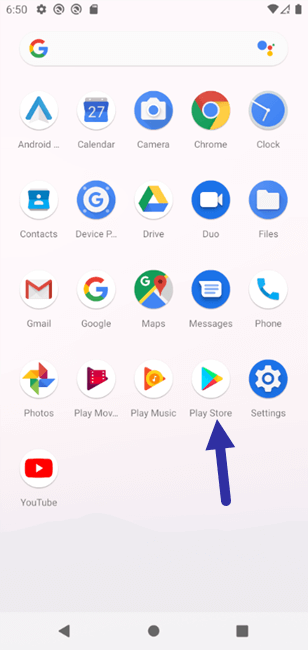
    launch emulator 271220
    install play store in android studio emulator 271220

    Why can’t I install Play Store manually?

    In case you are wondering why you need to create an entirely new virtual device just to have Play Store, it’s because Google doesn’t allow you to install the Play Store like any other app. The Play Store is deeply linked with the Android operating system and other core Google apps. As such, it is not possible to install it via the APK file. A few of the main reasons for this kind of behavior being security, reliability, and control.

    You can try to install the Play Store by download an APK from the internet. However, when you try that you will see the “The APK failed to install. Error: Could not parse error string.” message.
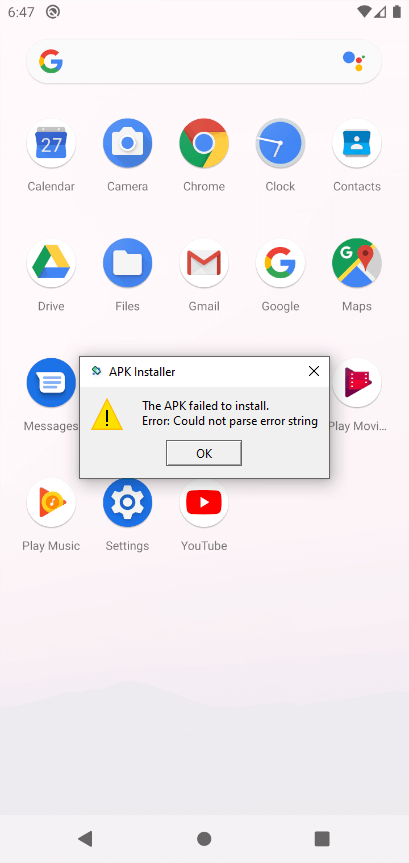
    apk failed to install 271220

    Now, there are some roundabout ways like using Open GApps. However, it is not worth the time and you couldn’t guarantee its compatibility or reliability. This is especially important since Google itself gives you the option to install a system image with Play Store already included.

    I hope that helps. If you need any help, comment below and I will try to help as much as possible.
  • How to Change Country in Google Play Store on Android

    How to Change Country in Google Play Store on Android

    To install apps available only in some countries, you can change the country in the Google Play Store. Here’s how you can do it.

    By default, the Google Play Store will default to the country you are living in. In case you are wondering, it gets the details of the country you are living in using the IP address and geo-location information. In case the Play Store cannot determine your location with IP or geo-location information, it sets the Play Store country from the connected Gmail account.

    Depending on where you live, some apps and even the Play Store functionality might be limited or outright not available. For example, if a specific app in the Play Store is available in the United States of America, you will not be able to download it from any other country. This can be a hassle when you are on a tour for work or vacation. To remove these kinds of geo-restrictions, you can change the country in the Google Play Store. Though the option is pretty well hidden, it is pretty easy to modify the country information in Google Play Store.

    In this quick and straightforward article, let me show you the steps to change the country in the Google Play Store.

    Important prerequisites

    To change the Play Store country, you need to be in that country. More specifically, your device should be in that country. Since the Play Store gets its geo-location information from the IP address, you can use a VPN service to change your IP address. For example, to set the Play Store country to the United States, you have to use the United States location in the VPN service.

    Also, don’t forget to turn OFF GPS. If you don’t turn off the GPS, the Play Store will use it to get the real-location.

    For some countries, Play Store also requires you to add a payment method of that country. The payment method can be anything like a debit card, credit card, internet banking, PayPal, etc. Depending on the country, the payment methods will be different.

    Do keep in mind that even when you move to another country or use a VPN service, it can take some time for the Play Store to detect the change. Until the Play Store detects the change in the location, you cannot change the country information.

    Steps to change country in Google Play Store

    Follow the steps given below to change the country in the Google Play Store.

    1. Open the Google Play Store.
    2. Tap on the hamburger (☰) icon.
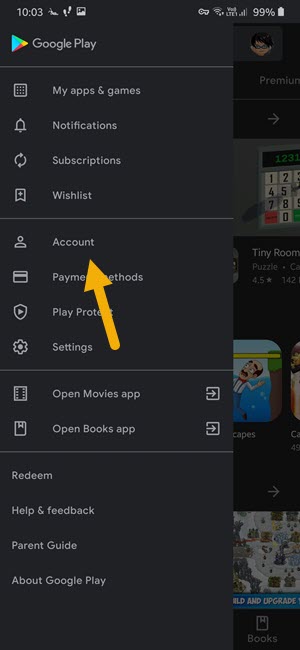
    3. Select the “Account” option.
    4. Go to the “Preferences” tab.
    5. Under the “Switch to country Play Store” choose the payment method of your choice.
    6. Fill in the payment details to change the country.

    Detailed steps

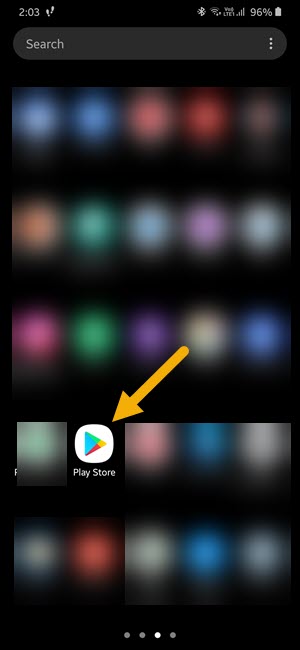
    1. First, open the Google Play Store app by tapping on the Play Store icon in the app drawer.

    2. After opening the Play Store app, tap on the hamburger (☰) icon appearing on the top left corner of the app. This is where you will find all the options to access the main settings and other options.

    3. From the sliding menu, select the “Account” option. This is where you will find the options related to your Play Store account.

    4. In the account screen, select the “Preferences” tab. This is where you can change the country information for Play Store.

    5. Under the “Country and Profiles → Switch to <country> Play Store” section, tap on the payment option of your choice. Then, fill in the required payment details and confirm the changes.

    As soon as you confirm the country changes, Google will queue the request and completes it in 48 hours. In those 48 hours, you might not be able to purchase or install apps using the new country info. That being said, in most cases, the changes are pretty instantaneous.

    Important Note: You can only change the country once every 365 days. So, please be completely sure when trying to change the country in Google Play Store. I recommend you switch the Google Play Store account first and then change the country. That way, you will have access to both profiles as and when needed.

    Cannot change the country

    If you cannot see the “Switch to <country> Play Store” section, it means that the Play Store did not detect the country change. As I said before, it can take some time for the Play Store app to detect the change and give you the payment options to switch country. Also, don’t forget to turn OFF the GPS to prevent the Play Store from knowing your real country.

    That is all. I hope that helps. If you need any help, comment below and I will try to help as much as possible.
  • How to Switch Accounts in Google Play Store (Change Account)

    How to Switch Accounts in Google Play Store (Change Account)

    You can use the Play Store with multiple Gmail accounts. Here are the steps to switch accounts in the Google Play Store on Android.

    To use the Google Play Store on Android, you are required to login with a Google account. If you don’t have a Google account, you can signup for one while setting up the Android device or from the web. Every app you purchase and download is linked to your Google account. Since apps and purchases are linked, when you sign in to another device using the same Google account, all relevant app data is restored automatically.

    Though not well known, you can log into the Play Store with multiple Google accounts. When using multiple accounts, you can change your Google Play account and restore the purchases and apps from that account. This is especially useful if you bought apps from the Play Store using multiple accounts. Basically, you can switch between accounts in Play Store to manage all your purchases in one place. There is no need to log out from one account to use another account.

    In this quick and straightforward article, let me show you the steps to switch accounts in Google Play Store on an Android device.

    Switch accounts in Google Play Store

    To change or switch accounts in the Google play store, follow these steps.

    1. Open the Google Play Store.
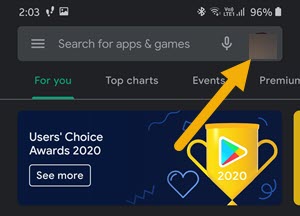
    2. Tap on the “User” icon.
    3. Select the account you want to switch to.
    4. If needed, close and re-open the Play Store app.

    Detailed steps

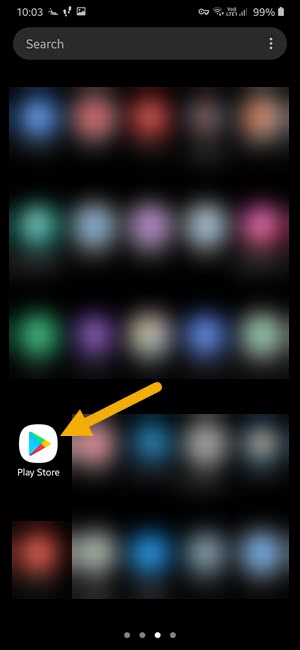
    1. First, open the app drawer, find the play store icon, and tap on it. Doing this will open the Play Store app on your phone or tablet.

    2. After opening the play store app, click on the user icon. You will see it in the top-right corner. In general, you can easily recognize it by your Google user account icon.

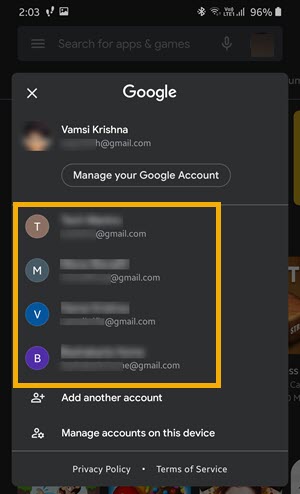
    3. The play store will now show an account selection pop-up. You will see all your linked Google accounts in this pop-up. Select the account you want to switch to.

    As soon as you select the account, the play store app will automatically switch the account and reload itself. Once that is done, you can install apps and restore purchases using the switched account. When needed, you can switch back to the old account by following the same steps.

    Cannot see additional Google accounts in the play store

    If you don’t see additional Google accounts in the pop-up screen, it is possible that you did not sign into them. Thankfully, you can add another account to the Play Store from the same pop-up screen. To add another account, tap on the “Add another account” option and follow the wizard. Once you are done, the account is added to the Play Store. You can then follow the steps shown above to switch accounts on the Google Play Store. In addition to the Play Store app, the Google account is also added to your Gmail account.

    I hope that helps. If you need any help, comment below and I will try to help as much as possible. If you like this article, check out how to remove the Meet tab in the Gmail app.