Tag: gmail app

  • How to Change Gmail App Swipe Actions on Android

    How to Change Gmail App Swipe Actions on Android

    Don’t like the default swipe actions in the Gmail app? Here are the steps to change Gmail app swipe action on Android phone or tablet.

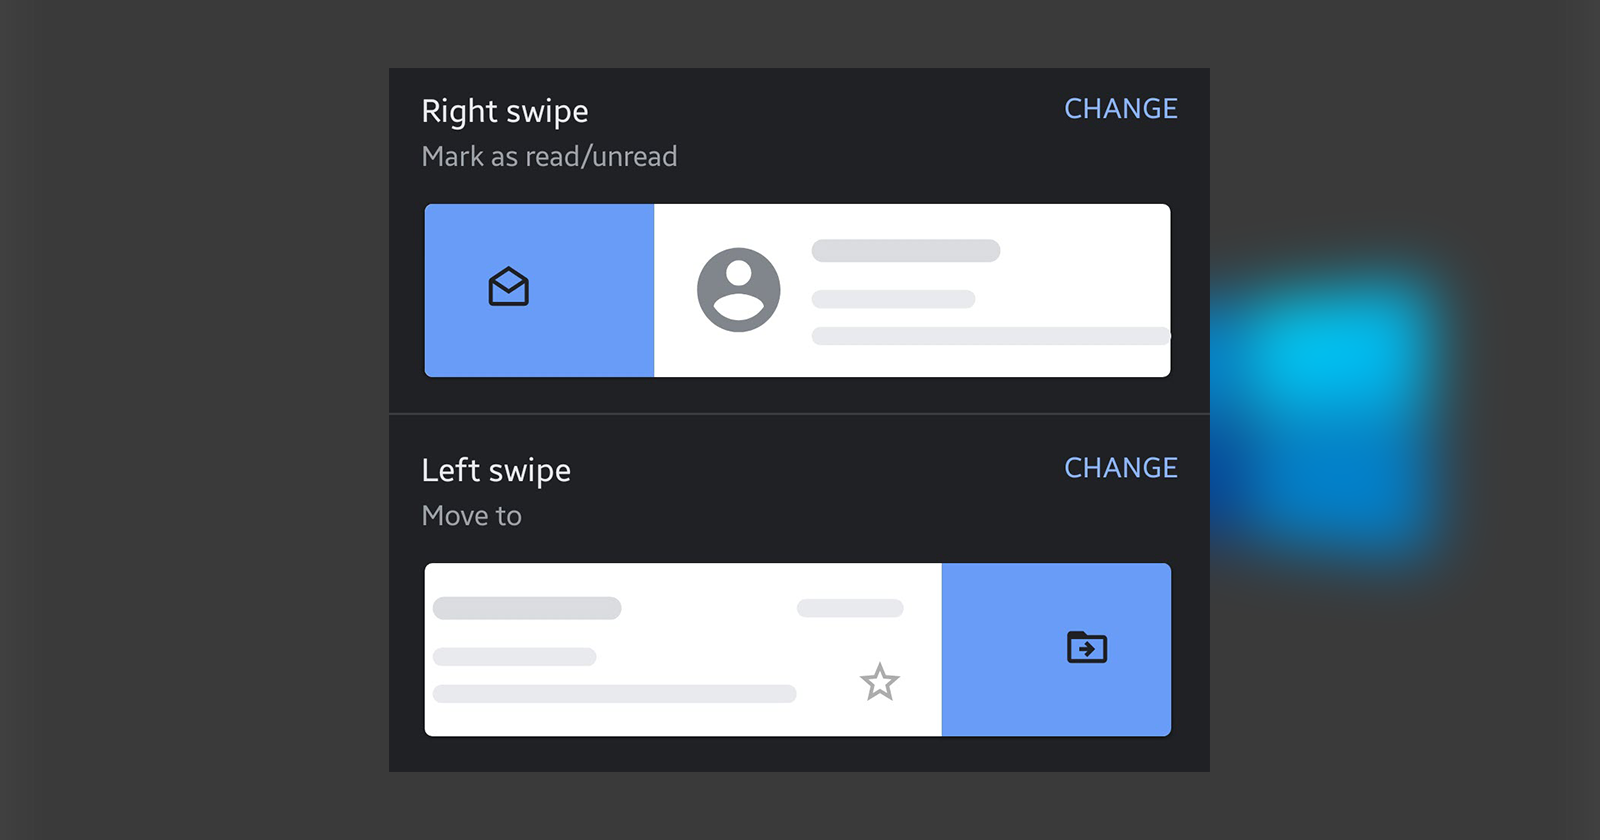
    To make the app user experience easy and intuitive, Gmail has a couple of swipe actions. The default two options are swipe to delete in Gmail or swipe to archive. By default, the actions are assigned to the left and right swipes. For the most part, both the right and left swipes are set to archive emails. On some occasions, the left swipe to assigned to delete emails. If you like to manage your emails on your phone, these swipe actions are really helpful to quickly archive, delete, mark as read, mark as unread, move to, and snooze.

    No matter the default swipe action, you can easily change it from the Gmail app’s settings page. Not only can you change the default actions but you can also disable Gmail swipe actions.

    Without any delay, let me show you the steps to change Gmail app swipe action in Android.

    How to change Gmail swipe actions

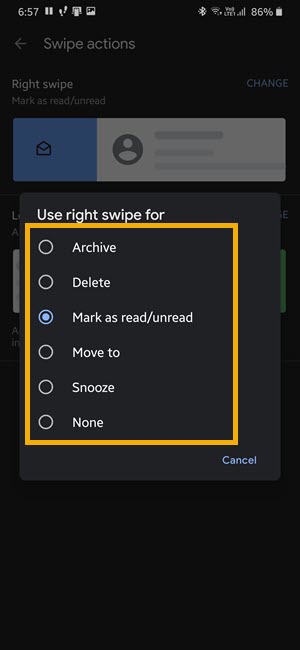
    The Gmail app gives you six different swipe actions. They are archive, delete, mark as read or unread, move to, snooze, and none. Here’s how you can open the Settings app to change the swiping behavior in the Gmail app.

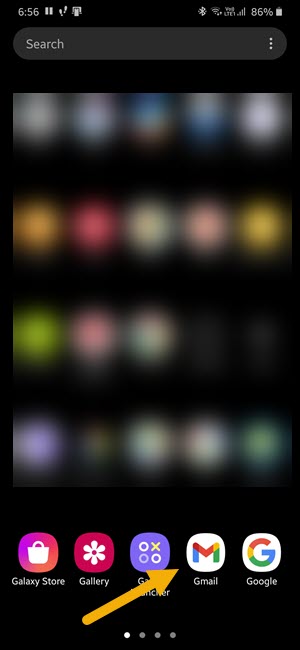
    1. Open the Gmail app on your Android phone. You can do that by tapping on the Gmail app icon in the app drawer or on the home screen.
    open gmail 311220

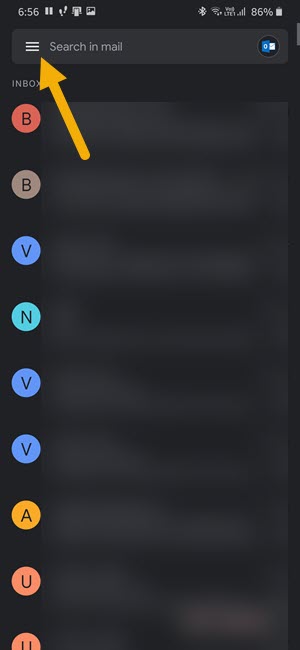
    2. Tap on the top-left menu icon (three horizontal lines) to open the sliding menu. You will see all the email folders along with the Settings option in the sliding menu.
    open gmail sliding menu 311220

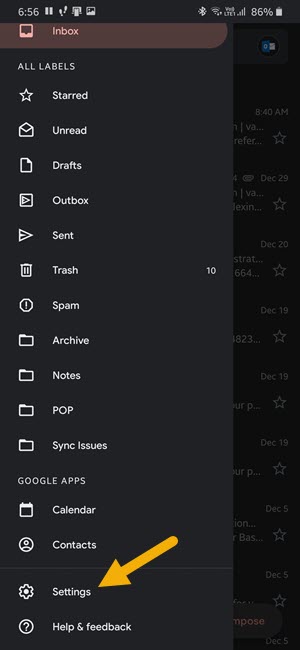
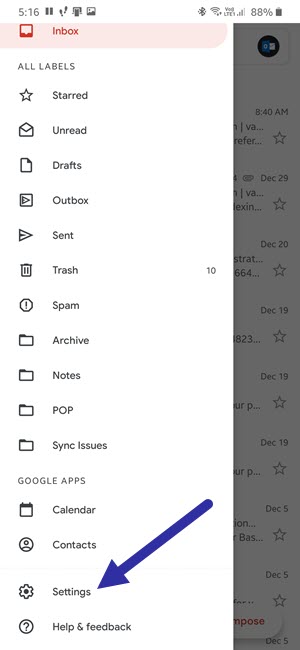
    3. Scroll down and tap on the “Settings” option to open the Gmail settings page.
    open gmail settings 311220

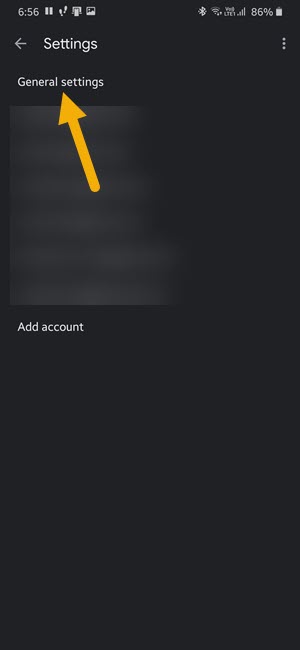
    4. Select the “General settings” option. This is where you will find all the options to manage your Gmail app.
    gmail general settings 311220 1

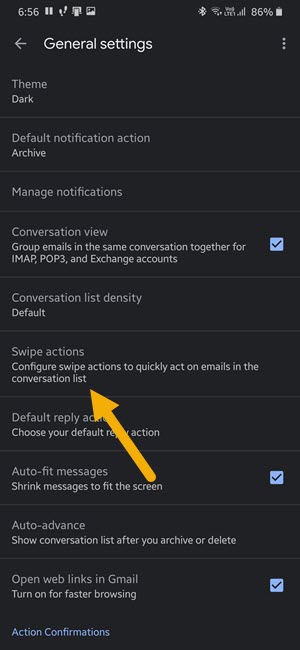
    5. Tap on the “Swipe actions” option in the Settings page. This is the option that lets you change swipe actions in Gmail app on Android.
    change gmail swipe actions 311220

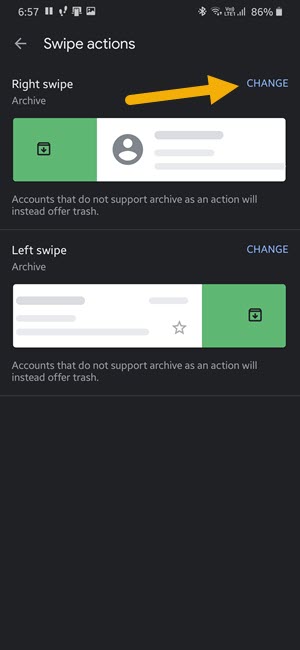
    6. To change right swipe action, tap on the “Change” option under “Right swipe.”
    right swipe action 311220

    7. Select a swipe action from the flyout menu. In my case, I chose the “Mark as read/unread” option.
    change gmail right wipe action 311220

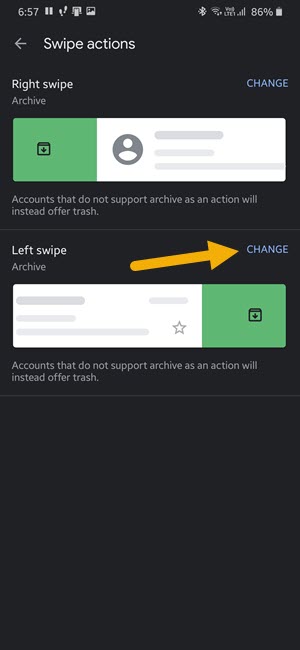
    8. To change left swipe action, tap on the “Change” option under “Left swipe.”
    left swipe action 311220

    9. Select a swipe action from the flyout menu. In my case, I chose the “Move to” option.
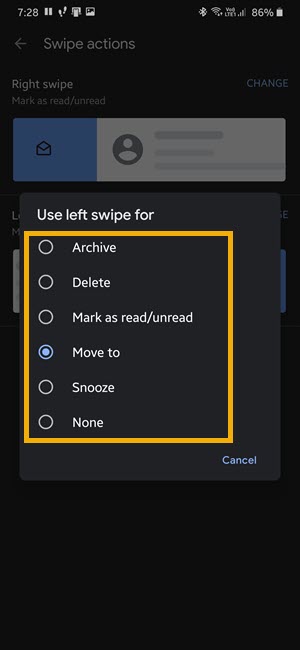
    change gmail left wipe action 311220

    10. To disable Gmail swipe action, select the “None” option in the flyout menu. You can disable both left and right swipe actions by selecting the None option.
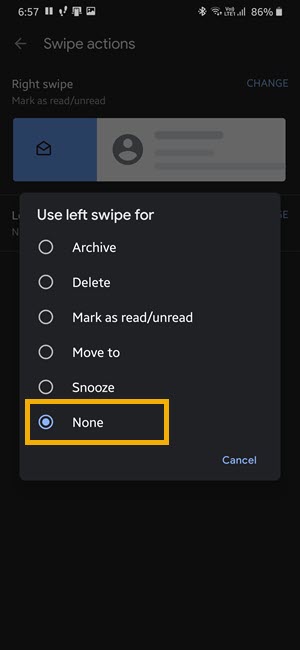
    disable gmail swipe actions 311220

    Wrapping up – Change Gmail swipe action

    That is all. With the above steps, you are all done with changing Gmail swipe actions in Android. You can go back to the main screen to start using the swipe action in the Gmail app. In case you are wondering, as of writing this, Gmail doesn’t give you any way to set your own swipe actions. All you can do is select from the default actions only.

    I hope that helps. If you need any help, comment below and I will try to help as much as possible.
    Check out how to turn on dark mode in Gmail app on Android.

  • How to Turn On Gmail Dark Mode on Android Phone

    How to Turn On Gmail Dark Mode on Android Phone

    Gmail has built-in dark theme to ease eye strain and improve battery life. Here’s how you can turn on the Gmail dark mode on an Android phone and tablet.

    As with most apps nowadays, Google recently introduced a brand new dark theme in the Gmail app. You can enable the dark mode in Gmail from the app settings. Once enabled, Gmail uses a sort of a dark gray color instead of the true black color as part of the dark theme. If you are using the app frequently or for prolonged periods of time, it is better to enable the dark theme in the Gmail app. This reduces eye strain, especially at night times or in places with low ambient light. If you are using a phone Amoled screen, you will even see improved battery life. Other than that, compared to the light theme, the dark theme in Gmail looks really good.

    Though the Gmail theme change setting is hidden pretty deep in the Settings, it is pretty easy to enable.

    In this simple and straightforward guide, let me show you the steps to turn on Gmail dark mode in Android phone or tablet.

    Turn on Gmail dark mode theme

    The dark theme option for Gmail is in its Settings page. Follow the steps below to open the Gmail settings page and turn on the dark mode.

    1. Open the Gmail app from the app drawer. If you placed the Gmail app on your home screen, you can open it from there.

    2. Tap on the hamburger menu (three horizontal lines) on the top left corner. This action will open the sliding menu.

    3. Scroll down and select the “Settings” option in the sliding menu. As soon as you tap on it, the Gmail settings page will open.

    gmail settings 311220

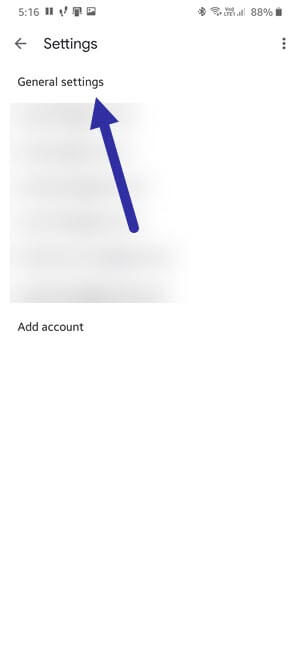
    4. Select the “General settings” option.

    gmail general settings 311220

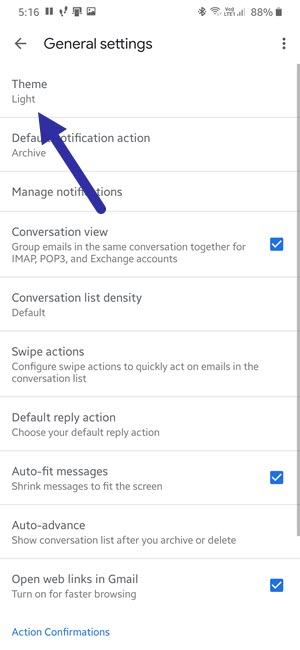
    5. Tap on the “Theme” option at the top of the Gmail settings page. This is the option that allow you to change the Gmail theme as needed.

    gmail theme settings 311220

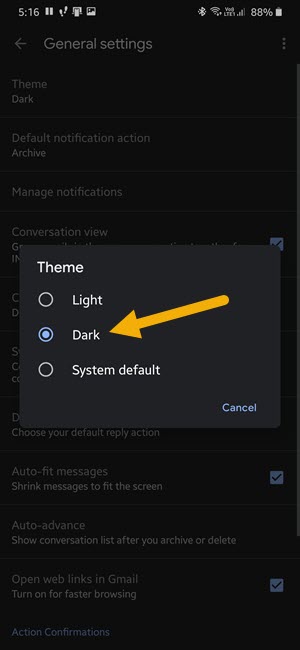
    6. Select “Dark” from the flyout menu.

    turn on gmail dark mode 311220
    Select ‘Dark’ to enable dark mode in Gmail app.

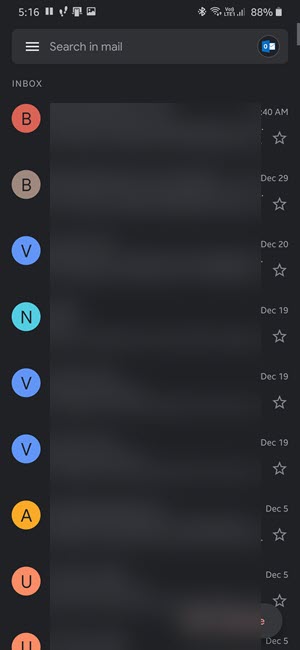
    That is it. As soon as you do that, the dark mode is enable in the Gmail app.

    gmail drak mode theme 311220

    Wrapping up: Gmail dark mode

    As you can see, though the option can be hard to find at times. It is very easy to turn on Gmail dark mode.

    While selecting the dark theme, you can also select the “System Default” option. Doing so will make the Gmail app use the current system theme. i.e, if you set your system theme to dark mode, Gmail will also use dark and vice-versa. This is particularly helpful if you set a schedule to auto-switch between light and dark modes. That way, you don’t have to manually switch between light mode and dark mode depending on the time of the day.

    Sometimes, the notification row icons might not switch to the light theme when you select dark mode in Gmail. In those cases, simply close the Gmail app and reopen it.

    I hope the steps to turn on dark theme in Gmail helped you. If you need any help, comment below and I will try to help as much as possible.
    Did you know you can remove the Meet now button in Gmail app?

  • How to Remove Google Meet Tab in Gmail App on Android

    How to Remove Google Meet Tab in Gmail App on Android

    You can easily get rid of the Meet tab in the Gmail app. Follow the steps in the article to remove the Google Meet tab in the Gmail app on Android.

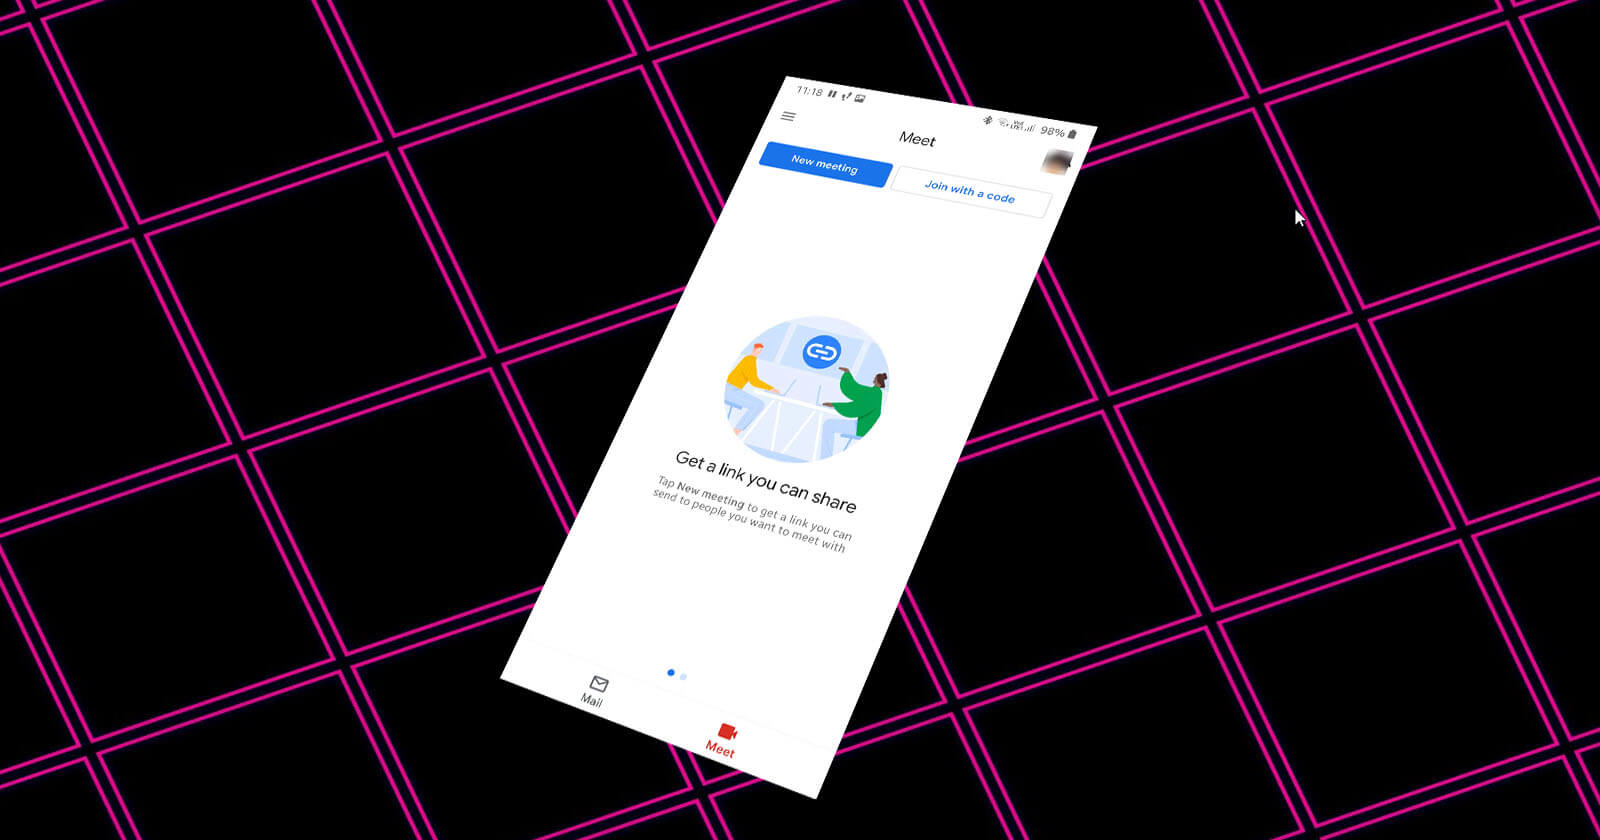
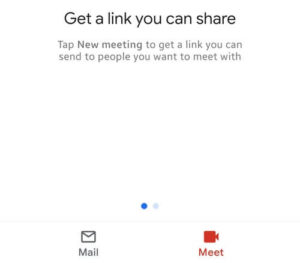
    With all the work from home happening around the globe, Google is putting a lot of money and thought into its other products like Google Meet. In fact, Google Meet came out of nowhere (kind of) and got quickly integrated into various different Google services and apps. One such integration is the new “Meet” tab in the Gmail app. As you can guess, the new Meet tab in the Gmail app allows you to quickly connect with your peers without the need to open another app.

    Rather than the “Meet” tab be an opt-in feature, Google chose the enable it by default in the Gmail app. Though this the most obvious integration, it’s just a distraction if you are not a Google Meet user. Thankfully, if you don’t like the new Meet tab, you can get rid of it from Gmail and restore the previous appearance.

    Follow the steps below to remove the Google Meet tab from the Gmail app on Android.

    Steps to Remove Google Meet Tab in Gmail App

    You would think that the option to disable the Meet tab in the Gmail app will in the general settings page. However, Google in their infinite wisdom chose to put it on the Gmail Account page. Never the less, it is pretty easy to remove the Meet tab in Gmail. Follow the steps below.

    1. Open the Gmail app.
    2. Tap on the “Three lines” icon.
    3. Scroll down and select “Settings”.
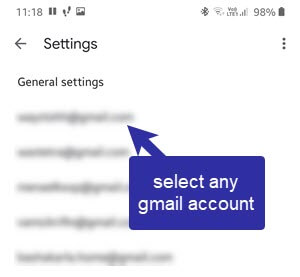
    4. Select any Gmail account from the list.
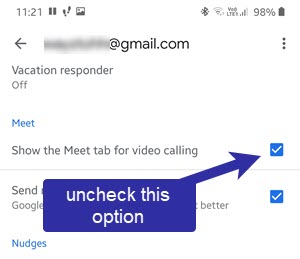
    5. Scroll down and uncheck the “Show the Meet tab for video calling” option.

    Detailed Steps

    1. First, open the Gmail app. You can do that by tapping on the Gmail icon in the app drawer.

    2. After opening the app, tap on the “three horizontal lines” appearing in the top-left corner. This is called the hamburger menu icon.

    Note: Depending on the app update, Google might change the position of the Menu icon. However, you can generally recognize it with “three horizontal lines”.

    3. Now, scroll all the way down and select the “Settings” option.

    4. In the Settings page, select any Gmail account. As I said before, the option to remove the Meet tab is available only on the Gmail account settings page.

    5. Here, scroll down until you find the “Meet” section. Generally, you find it in the middle part of the page.

    6. Once you are here, uncheck the “Show the Meet tab for video calling” option.

    As soon as you uncheck the option, Gmail will restart itself to apply the changes. From now on, you will not see the Meet tab on the main Gmail screen.

    Since there are no extra tabs at the bottom, the user interface looks clean and you will get a bit more screen real estate to work with emails.

    That is all. I hope that helps. If you need any help, comment below and I will try to help as much as possible.